all tables are now attached to each other.
Started cutting the plywood.
Cookie cutting time.
Saturday, February 27, 2016
Friday, February 26, 2016
Cookie cutter
Finally started cookie cutting plywood...
Disappoint at the quality of the plywood I got.
But moving forward
Disappoint at the quality of the plywood I got.
But moving forward
Monday, February 22, 2016
from CAD to real world
Transferring my computer-generated track layout to the plywood is proving to me more difficult than I thought. The CAD program didn't print the center of the 22", 33" radius used... having to use some old fashioned "find the center of a circle" technique...
Maybe i should just glue the paper tracks to the plywood and cut it using it as a guide (we do that on model airplanes)_
Wednesday, February 17, 2016
FreeCAD blues
My favorite free 3D CAD system is being mean to me. For the life of me I'm cannot figure out how to model the track bed in 3D !
I think this can be done ... I just can't figure it out!
Monday, February 15, 2016
Track Templates 1
Got the printout of my CAD track design.
Will use this to create templates for the elevated bed tracks.
Printed Layout
Printed the track layout at a local architects blue-print service.
$19.00 to print three 36"x120" sheets.
Saturday, February 13, 2016
Reinforcing legs
Adding reinforcements to all the legs so that all legs are L beams.
2/7 tables done today.
Friday, February 12, 2016
Reorganizing the Garage
The time came to pick the final location for our layout.
This layout was designed to fit in a small room, so it made sense to put it against a corner of the garage.
Our main issues are finding a new place for the bikes and reorganizing the peg board so we can reach the tools.
The big square table goes against the corner. The design includes a hole so we can reach every corner of the corner section and more importantly the circuit breakers on the wall !!! |
It pays to have a little guy to help position things. |
You taking pictures? |
Stop taking pictures! |
Oh oh... the other bike is on the way eh? |
Yes, we are finally done for the day! |
Zero progress
zero progress on thrusday
Too much work
Too tired to do anything at the end of the day.
Friday today!
Too much work
Too tired to do anything at the end of the day.
Friday today!
Wednesday, February 10, 2016
Plane away
Using a hand-plane trimmed away the plywood in places where the cuts left ply hanging over the girders.
Now all parts fit perfectly like Tetris.
Still need to reinforce least some of the legs and put ply on the last section.
Now all parts fit perfectly like Tetris.
Still need to reinforce least some of the legs and put ply on the last section.
Monday, February 8, 2016
3 steps forward, one step back and two steps forwardy a
Yesterday Sunday, took one day of working on the train to go fly model airplanes.
Monday evening I was ready to work.
Cut the last prices of plywood with the circular saw before dinner. I don't like t annoy the neighbors with th noise.
After dinner son and I went back to the store to buy more 2x1s and a plane.
We rapidly installed legs on the last section that needed them. Also rapidly glad and nailed the plywood on all sections but one.
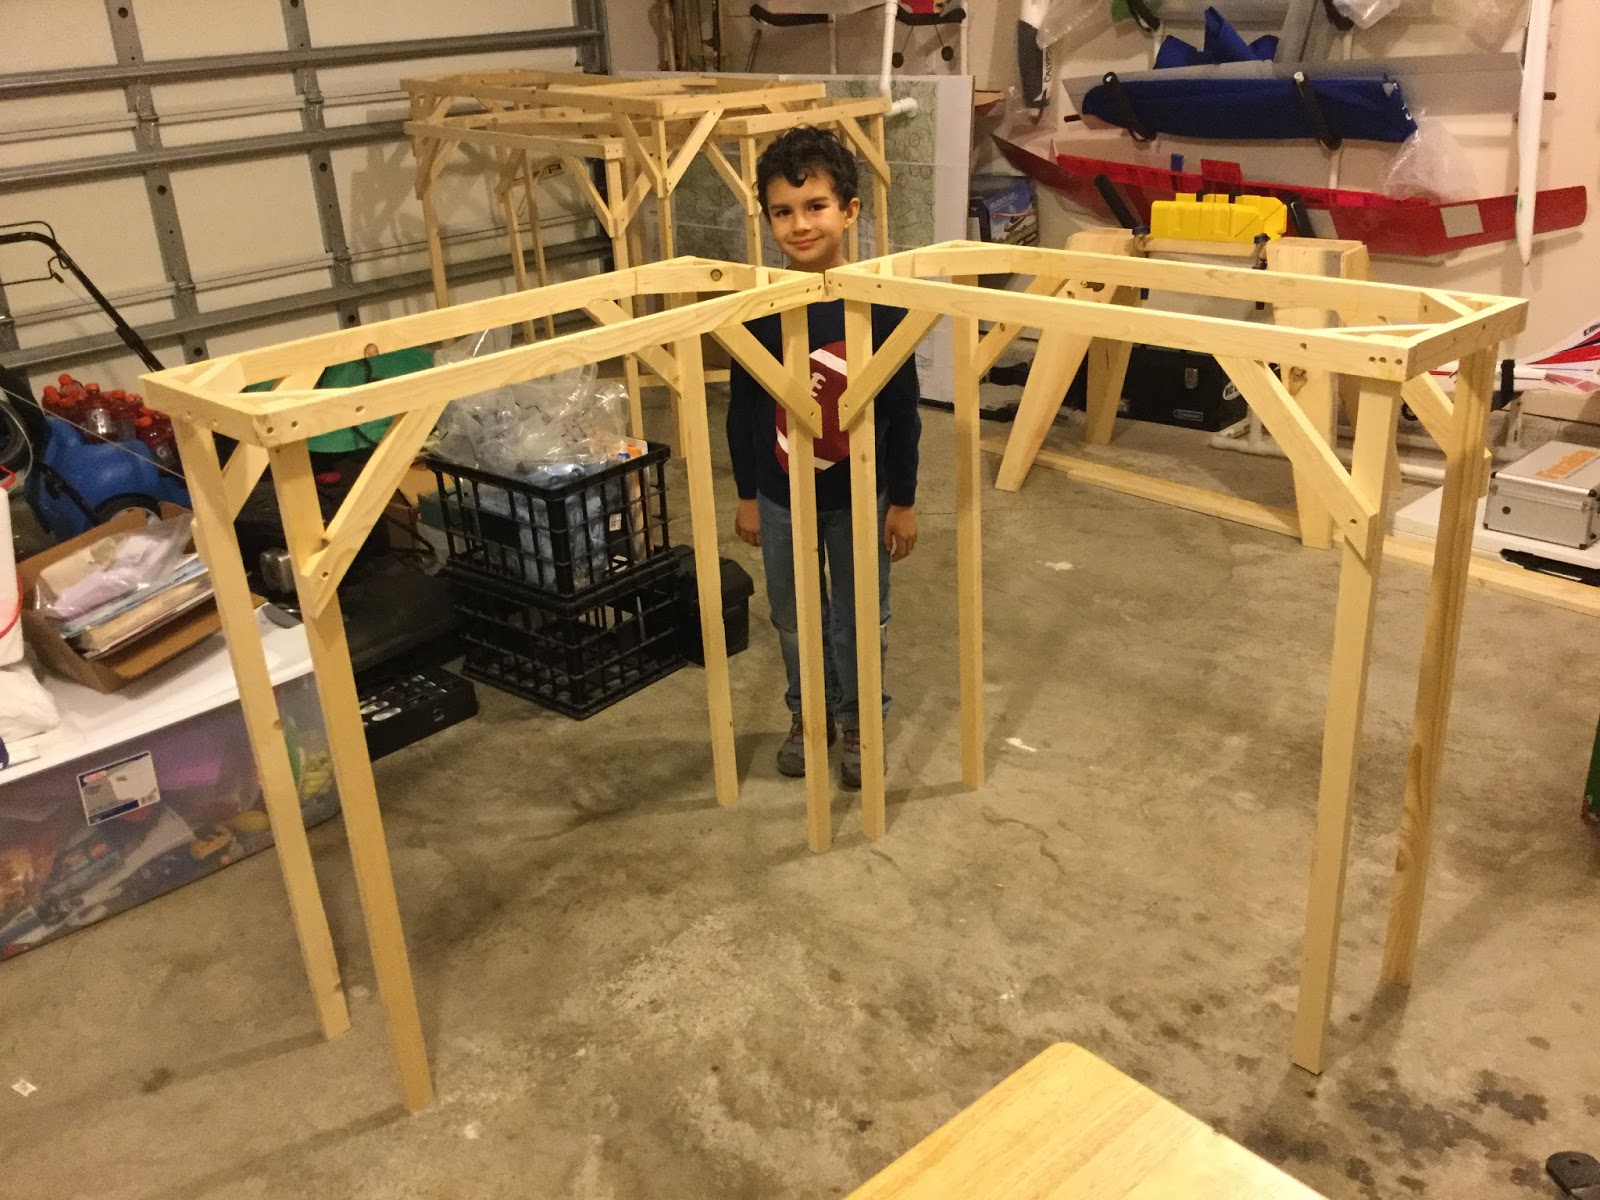
Since I had noticed that the two large sections were a bit wobbly, I add a reinforcement on the legs. Making them a two piece 2x1 legs. The boards were arranged 90° to each other. The result was a more stiffer table.
Before going to bed decided to arrange the sections I their proper positions. Then is when I realized I had assembled one part backwards.
I blame it on my left handed syndrome. I think I was forced to use my right hand a kid. ( it's been my excuse forever to justify my sloppy handwriting LOL!)
Never make asymmetric tables and not pay attention wich side you put the plywood!
A few pieces of 2x1 and I made the table a rectangular table and we will have to live with it.
The layout is eating most of my garage!
Anyways it was a productive day!
Saturday, February 6, 2016
Plywood time
Decisions:
Working on it:
Man! Have I forgotten how tricky ply can be.
Had to figure out what kind of ply to get. Ended up getting "sanded" ply 1/2" at Home Depot.
Sanded? I guess my definition of "sanded" is not the same as Home Depot.
Thought making the straight cuts would be "super-easy" ... nope... My circular saw doesn't have a "fine-enough" blade. Not terribly great quality ... but will do ... Really bothers me that the ply is not exactly even with the side of the table on some edges.
Potential problem:
Table is stable in one direction no so much in the other direction. May have to add a second leg 90 to fix it. We'll see.
The Photos:
This corner shows the issue with being stable in one direction and not the other. If you push the table from right to left it is very stable. If you push forward it shakes some. obviously that leg is flexing in the direction of the narrow side. Possible solution is to add a second leg (doesn't have to go all the way down. to make the leg a two pieces glued/screwed at 90º
The three sections with ply. Two with legs one without legs. One section on the bottom drying up.
- Will add a 1/2" ply top to each section.
- Ply will be glued and nailed in place.
- Will use 1" foam on top of the ply to actually build the model. And extend a little the sections to make nice curves.
Working on it:
Man! Have I forgotten how tricky ply can be.
Had to figure out what kind of ply to get. Ended up getting "sanded" ply 1/2" at Home Depot.
Sanded? I guess my definition of "sanded" is not the same as Home Depot.
Thought making the straight cuts would be "super-easy" ... nope... My circular saw doesn't have a "fine-enough" blade. Not terribly great quality ... but will do ... Really bothers me that the ply is not exactly even with the side of the table on some edges.
Potential problem:
Table is stable in one direction no so much in the other direction. May have to add a second leg 90 to fix it. We'll see.
The Photos:
This corner shows the issue with being stable in one direction and not the other. If you push the table from right to left it is very stable. If you push forward it shakes some. obviously that leg is flexing in the direction of the narrow side. Possible solution is to add a second leg (doesn't have to go all the way down. to make the leg a two pieces glued/screwed at 90º
The section on the bottom has no legs and is drying up.
The three sections with ply. Two with legs one without legs. One section on the bottom drying up.
Friday, February 5, 2016
6 sections of 7 done!
Sections 5 & 7 in progress.
Two tired to finish the two sections I set to finish tonight.
Completed sections waiting final assembly.
Wednesday, February 3, 2016
Section 4th Complete (3 to go)
Working from 5:30pm until Midnight finished section 4.
Getting a bit smarter about putting these together.
Should have paid more attention in shop class. :)
Son helped the best he could, of course. His mother made him go to bed by 8:30pm
Finally we are over 1/2 getting the bench out of the computer ;)
three more to go:
![]() |
Wireframe sections still undone. |
Like how is this coming about. The structure is very light and with the braces is fairly firm.
Granted this is not for humans to sit on. But should do ok holding a train layout.
Tuesday, February 2, 2016
3rd section almost done.
Sometimes is hard to get things out of the computer? Maybe this is a case of "too much CAD, too soon"
This one ended up being harder than the previous two sections.
The corner with the diagonal would require a compound cut on the leg braces. I don't have the tools to properly do that. Had to change the design "on the fly" as me and my son tried to put it together.
I don't think the legs are going to be very firm the way they are built. May have to put extra "X" braces or put an additional brace between the legs on the bottom. (like we are having to do in one part of section 3)
![]() |
The original CAD drawing (not perfect, should have spent more time on it) |
Looks done |
Leg braces were easier to do now on section 3 |
one side of the leg braces is missing because of the angles |
adhoc change to brace this angle. seems sturdy enough. |
Bottom brace will be needed here to compensate the lack of braces on the top. |
Rail Layout Program
I used Rail Modeller Pro on my Mac to redraw the layout.
On the left list the height is 5" on the right side it is 1.5"
![]() |
![]() |
Rail Modeller Pro Image of the layout. |
Dimensional wood
Well I should have paid more attention in shop class.
when you buy wood 1x2 is really not 1x2 but 0.75x1.5 Grrr...
... thank fully some redrawing fixed the problem... and also some minor redesign here and there.
they joys of getting designs out of the computer in the real world
This is meant as a light weight structure. This doesn't mean "easy" to do. those diagonal braces are a chore. But I'm not complaining.
The Beginning (catching up)
Well for the past 2-3 weeks we have been planning and working on a HO-Scale Layout for my son Ian.
I should have started this blog earlier. But oh well. Here is my attempt to catching up.
He's liked trains since he was very young and has built several Thomas wood tracks for a while.
In anticipation to his birthday we got him a brand new "starter set" from Bachmann
The best thing about "projects" in the home is that you get to buy tools ;)
Sorry 8 year old kiddo, no chop-saw for you. Yet.
I should have started this blog earlier. But oh well. Here is my attempt to catching up.
He's liked trains since he was very young and has built several Thomas wood tracks for a while.
In anticipation to his birthday we got him a brand new "starter set" from Bachmann
Now we cannot just leave it at that right?
So here comes my geek side and researching decide to build a bigger layout for this (and hopefully many other trains).
This is a 10x8 layout from http://www.layoutvision.com. Why 10x8? Because a 10x8 layout is the same as a 4x8 layout!
Had to flip the layout around so that it will fit on the space I have for it. Not a big deal.
The train layout has to sit on a "bench". Using FreeCad (an open source 3D design program) I start working on a proper and bigger layout for the train. Have to make sure a normal size human can use the bench and the layout. 3D modeling makes it easier.
The best thing about "projects" in the home is that you get to buy tools ;)
Helping Mommy visualize what we are doing.
Subscribe to:
Posts (Atom)